1911 Model T Torpedo #58336
Progress as of 6/18/Y2K
With classes over for the year, I have been able to devote more time
to work on the torpedo. Here are some views of the current state of the
torpedo. As you can see, compared to the May 7 photos, progress has been
made in several areas.
The Body
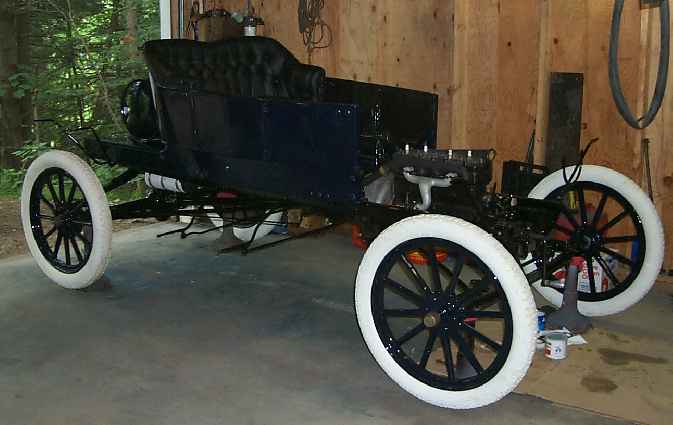 The seat section has been reattached to the body platform for
the final time (I hope) and the doors are now on. You will also note that
the wheels have been painted and are on as well. The wheels came out well.
I used Featherfill as the primer on the wood, sanded with 150, then 220
and finally 320 before giving it a coat of Dupont Veraseal sealer, then
two coats of Dupont Centari with gloss additive. Painting wheels is always
a bit tricky. I paint them mounted on a pair of old axles I keep around
for just that purpose. It allows me to spind the wheels while painting.
The trick is not getting too much paint in the center when using a back
and forth sweeping pattern on the spokes. The other addvantage to having
the wheels on the axles is that I can continue to rotate them as the paint
sets up, so if I see a goober starting to form, I can rotate the wheel 180
degrees and let the paint smooth out again. The final results are quite
pleasing.
The seat section has been reattached to the body platform for
the final time (I hope) and the doors are now on. You will also note that
the wheels have been painted and are on as well. The wheels came out well.
I used Featherfill as the primer on the wood, sanded with 150, then 220
and finally 320 before giving it a coat of Dupont Veraseal sealer, then
two coats of Dupont Centari with gloss additive. Painting wheels is always
a bit tricky. I paint them mounted on a pair of old axles I keep around
for just that purpose. It allows me to spind the wheels while painting.
The trick is not getting too much paint in the center when using a back
and forth sweeping pattern on the spokes. The other addvantage to having
the wheels on the axles is that I can continue to rotate them as the paint
sets up, so if I see a goober starting to form, I can rotate the wheel 180
degrees and let the paint smooth out again. The final results are quite
pleasing.
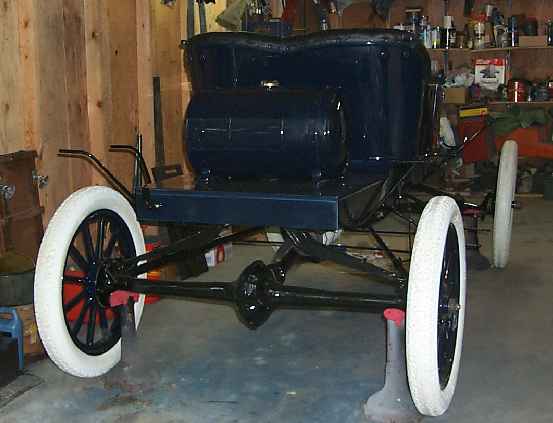 The gas tank is mounted. The body, fenders and gas tank were
painted last year, so the paint has had about 10 months to cure. There were
a couple of small goobers in the tank, but I was able to remove them by
first using a small vixen paint run file, then wet sanding with 400, 600
and 1200. Power buffing left a nice smooth finish.
The gas tank is mounted. The body, fenders and gas tank were
painted last year, so the paint has had about 10 months to cure. There were
a couple of small goobers in the tank, but I was able to remove them by
first using a small vixen paint run file, then wet sanding with 400, 600
and 1200. Power buffing left a nice smooth finish.
The Upholstery
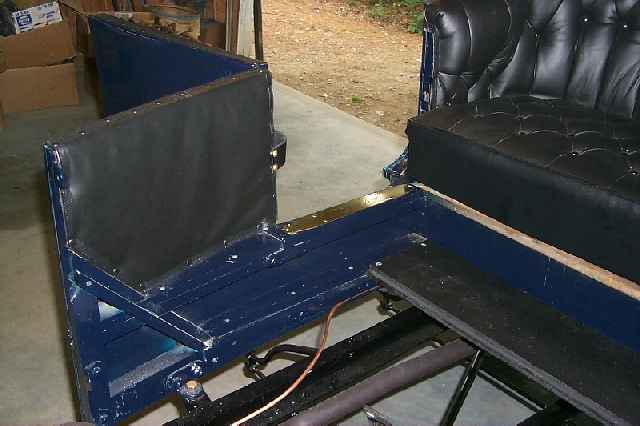
The most recent challenge has been putting in the seat upholstery.
 The upholstery kit came from Carter's. Kit is the operative word.
The seat bottom was installed by Carter's and that came out fine, except
that they chose to attach the covering to a sheet of plywood rather than
the springs, consequently the seat does not fit over the square nuts that
hold the front top irons to the seat frame. The back was another story.
The pleats were stuffed with cotton batting and looked very lumpy. Nothing
seemed to fit well. I ended up taking the seat back apart, and rebuilding
the stuffing with foam and poly fill and now the pleats look something like
what they should. The final product is adequate. If I had it to do over
again, I would probably go a different route.
The upholstery kit came from Carter's. Kit is the operative word.
The seat bottom was installed by Carter's and that came out fine, except
that they chose to attach the covering to a sheet of plywood rather than
the springs, consequently the seat does not fit over the square nuts that
hold the front top irons to the seat frame. The back was another story.
The pleats were stuffed with cotton batting and looked very lumpy. Nothing
seemed to fit well. I ended up taking the seat back apart, and rebuilding
the stuffing with foam and poly fill and now the pleats look something like
what they should. The final product is adequate. If I had it to do over
again, I would probably go a different route.
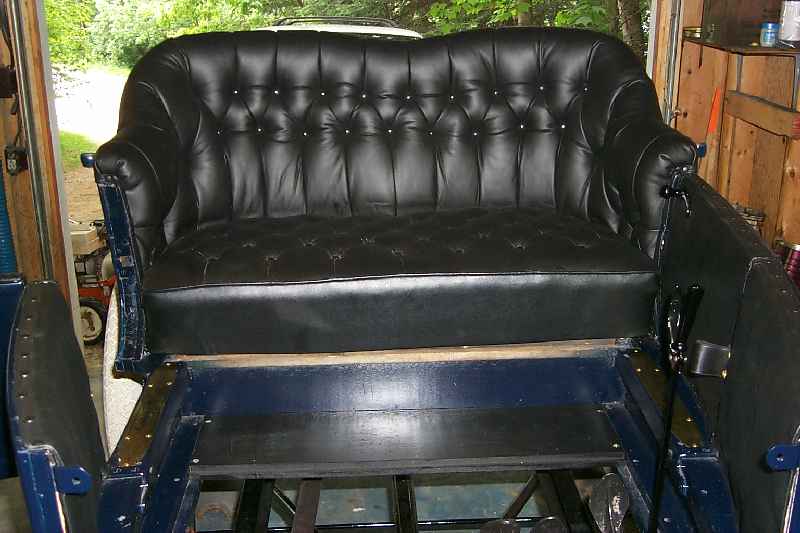 Seems like there ought to be a trim piece just at the front of
the bottom edge of the seat. My pictures of orginal torpedo upholstery don't
show clearly what should be there and there are few tack holes or other
clues to what it originally looked like.
Seems like there ought to be a trim piece just at the front of
the bottom edge of the seat. My pictures of orginal torpedo upholstery don't
show clearly what should be there and there are few tack holes or other
clues to what it originally looked like.
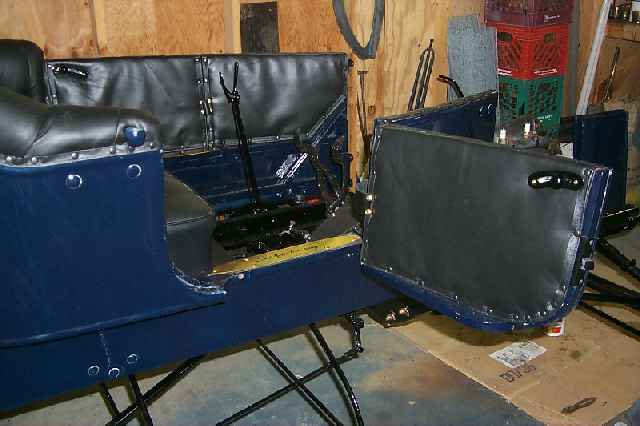 Carter's supplied dead Nauga skin for the door and kick panels.
I couldn't live with that and picked up about a quarter hide of black and
made my coverings out of that. If the panels look soft or stuffed, that's
because they are and that is the look I was striving for. Look at the picture
of the original torpedo door and kick panels on car #58170 (a Wilson-bodied
car built the day before 58336 was.)
Carter's supplied dead Nauga skin for the door and kick panels.
I couldn't live with that and picked up about a quarter hide of black and
made my coverings out of that. If the panels look soft or stuffed, that's
because they are and that is the look I was striving for. Look at the picture
of the original torpedo door and kick panels on car #58170 (a Wilson-bodied
car built the day before 58336 was.)
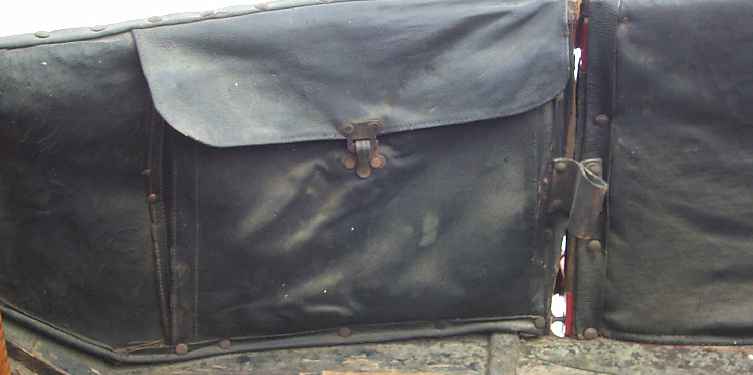 The panel pocket is not original, but the area ahead of it and
the door are original.
The panel pocket is not original, but the area ahead of it and
the door are original.
 The top edges are not square as if the leather was streched directly
over the wood, but appear soft and rounded. So this is the look I was striving
for.
The top edges are not square as if the leather was streched directly
over the wood, but appear soft and rounded. So this is the look I was striving
for.
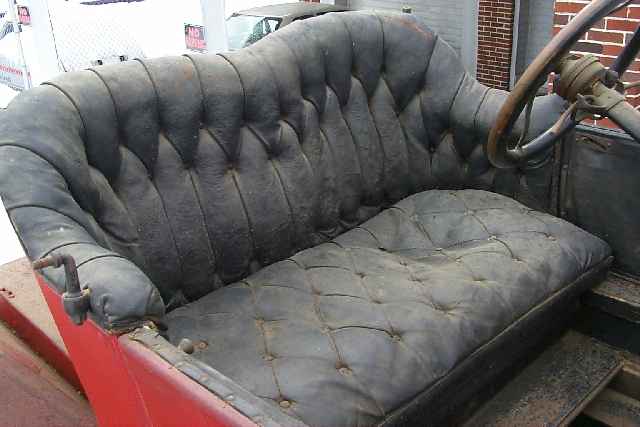 Word of advice: next time you're restoring an early brass era
car find an untouched original in excellent condition that was built the
day before and by the same body manufacturer as the car you are restoring.
89 years later this seat still looks good.
Word of advice: next time you're restoring an early brass era
car find an untouched original in excellent condition that was built the
day before and by the same body manufacturer as the car you are restoring.
89 years later this seat still looks good.
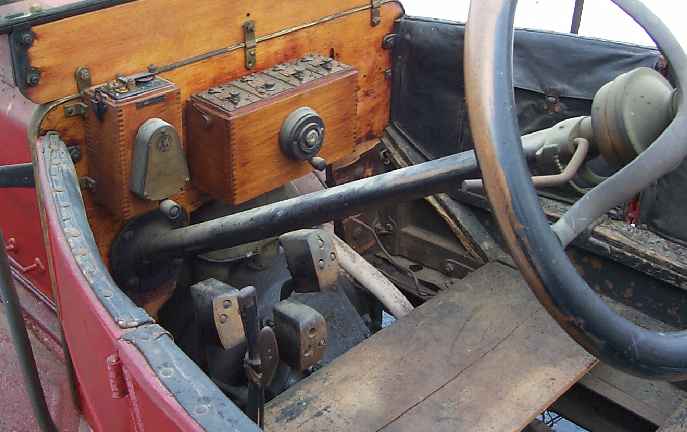
The Body
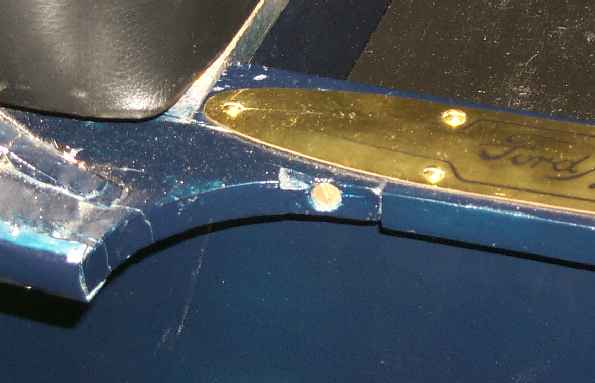
I have learned that there are some differences in the construction of
torpedo bodies by the different body manufactures. This car was built by
the C.R. Wilson Body Company. Note how the seat merges into the bottom and
is attached to the sill by a flat head wood screw.
 The following picture was taken of car #50980's seat and bottom
door jam:
The following picture was taken of car #50980's seat and bottom
door jam:
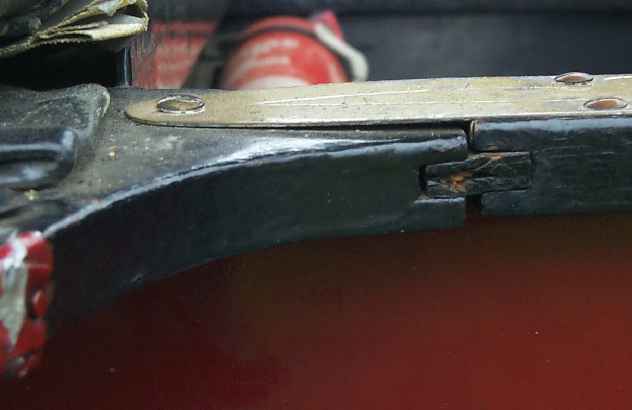 On this car the seat section is attached to the door jam by a
wood "biscuit". Diminsionally the two systems are the same, but
the technique of construction is different. I do not know the body manufacturer
of this car - we were unable to find the body number on the front edge of
the seat frame so it could be either a Beaudette or Hayes.
On this car the seat section is attached to the door jam by a
wood "biscuit". Diminsionally the two systems are the same, but
the technique of construction is different. I do not know the body manufacturer
of this car - we were unable to find the body number on the front edge of
the seat frame so it could be either a Beaudette or Hayes.
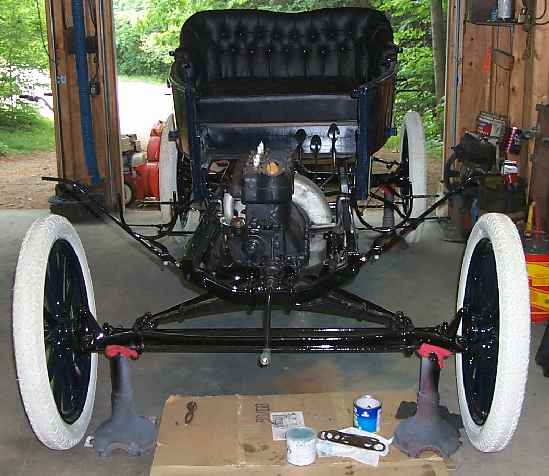
 The gas line is in. The line is nearly 7 feet long (!) and meanders
around the sill and the bottom of the tool box under the seat before finally
curving in to the sediment bowl. We know this from some research Steve Coniff
did on his original torpedo. Steve drew the following map:
The gas line is in. The line is nearly 7 feet long (!) and meanders
around the sill and the bottom of the tool box under the seat before finally
curving in to the sediment bowl. We know this from some research Steve Coniff
did on his original torpedo. Steve drew the following map:
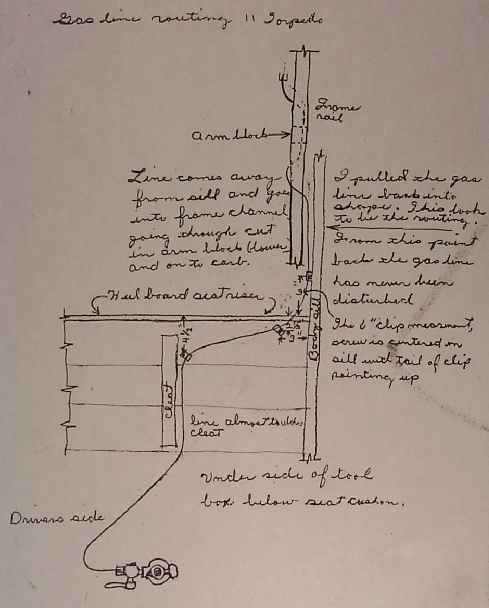 The three little clips Steve shows are Ford Factory Number T-1395
Gas Line Clips (3 used on enclosed and open runabouts, 1911). The drawing
survives and making the clips took about an hour.
The three little clips Steve shows are Ford Factory Number T-1395
Gas Line Clips (3 used on enclosed and open runabouts, 1911). The drawing
survives and making the clips took about an hour.
Conclusion
The dash has been stained and two coats of varnish applied. Found an
unfinished furniture store that had a wide variety of stains in assorted
colors. I am using "Barn Red". The dash needs another coat of
varnish, but the humidity has been so high for the past 5 days that varnish
is drying very slowly. Before installing the dash, the front fenders will
have to go on: I found the drawing for the front fenders showing the cutout
for the dash bracket that the repro fender maker didn't put in after I had
the fenders painted. So by the time of the next report, it should be beginning
to look like a car again. I wonder if it will run.....